Tutorial Part 7: Create Categories with Classifiers
Now we actually want to go back to our blog posts and organize them. We can do that by adding Classifiers to our pages so that we can access them via their category.
What are Classifiers?
Classifiers are essentially categories that you give to an item. For our pharmaceutical company, classifiers that we might use could be something like:
Vaccines: Covid-19, Chickenpox, Tetanus, Monkeypox etc.
Types of health issues: Cancers, Autoimmune, Heart Disease, Diabetes, etc.
Types of content: News, Press, Interviews, FAQs, etc.
Adding Classifiers in the CMS
You can start adding Classifiers by going to Snippets > Classifiers. Select that you want to add a new Classifier, and you would do this for each Classifier that you want to add.
For the purposes of this tutorial, we are going to add a Content Types classifier and a Vaccines classifier.
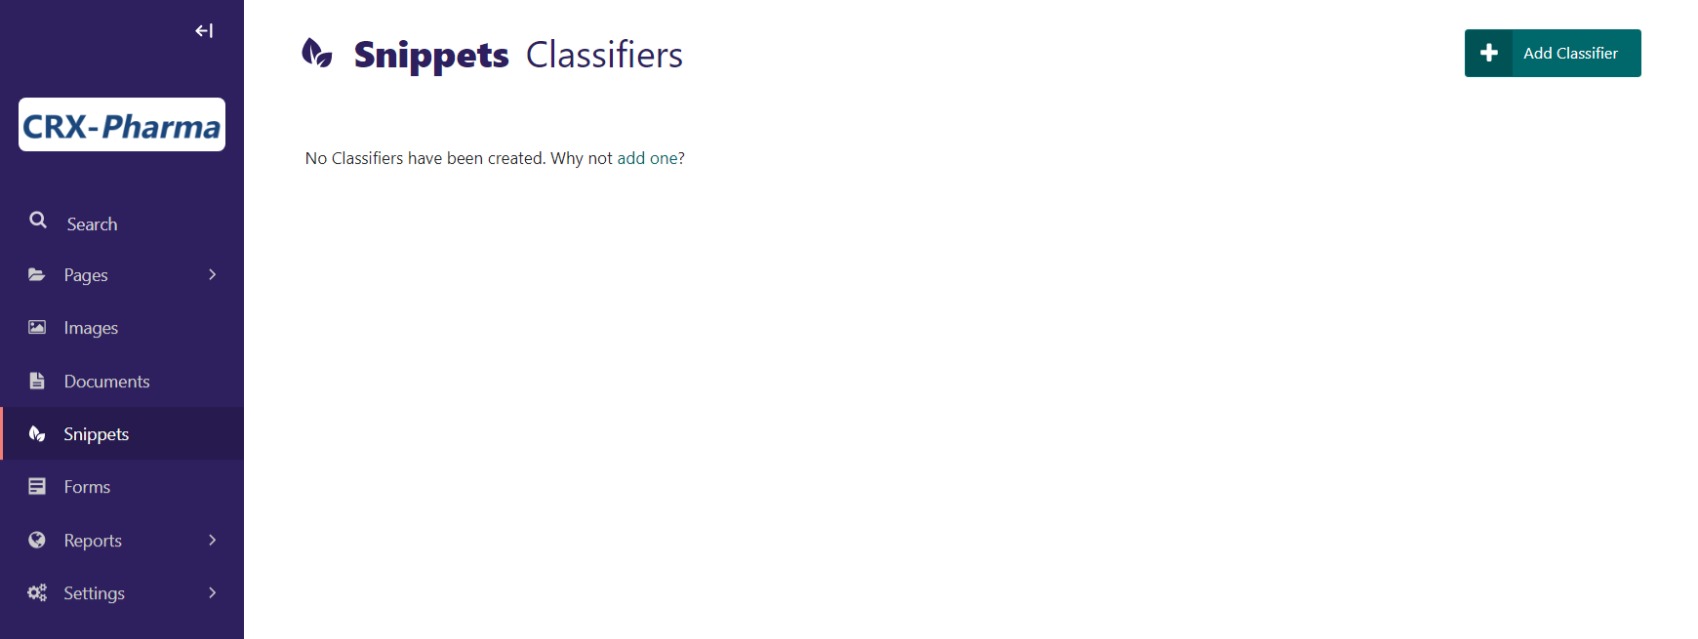
The admin screen for adding a new Classifier.
The first Classifier we are adding will be for Vaccines. For Name, we would put Vaccines because this is the generalized heading for the category. Then we would click the Add Classifier Terms button to begin adding the sub-categories below that main term.
Save and Add more Classifiers for type of health issues and types of content. Here’s our editor after those additions:
The edit screen for the Classifiers that we added.
Note
We realize that you could decide that you want to add Classifiers in the middle of building your pages. If you have not already added Classifiers in Snippets, you can click the Classify tab in the page editor and select that you want to create Classifiers. It will take you to the Snippets editor for Classifiers to do so.
Selecting Classifiers for your pages
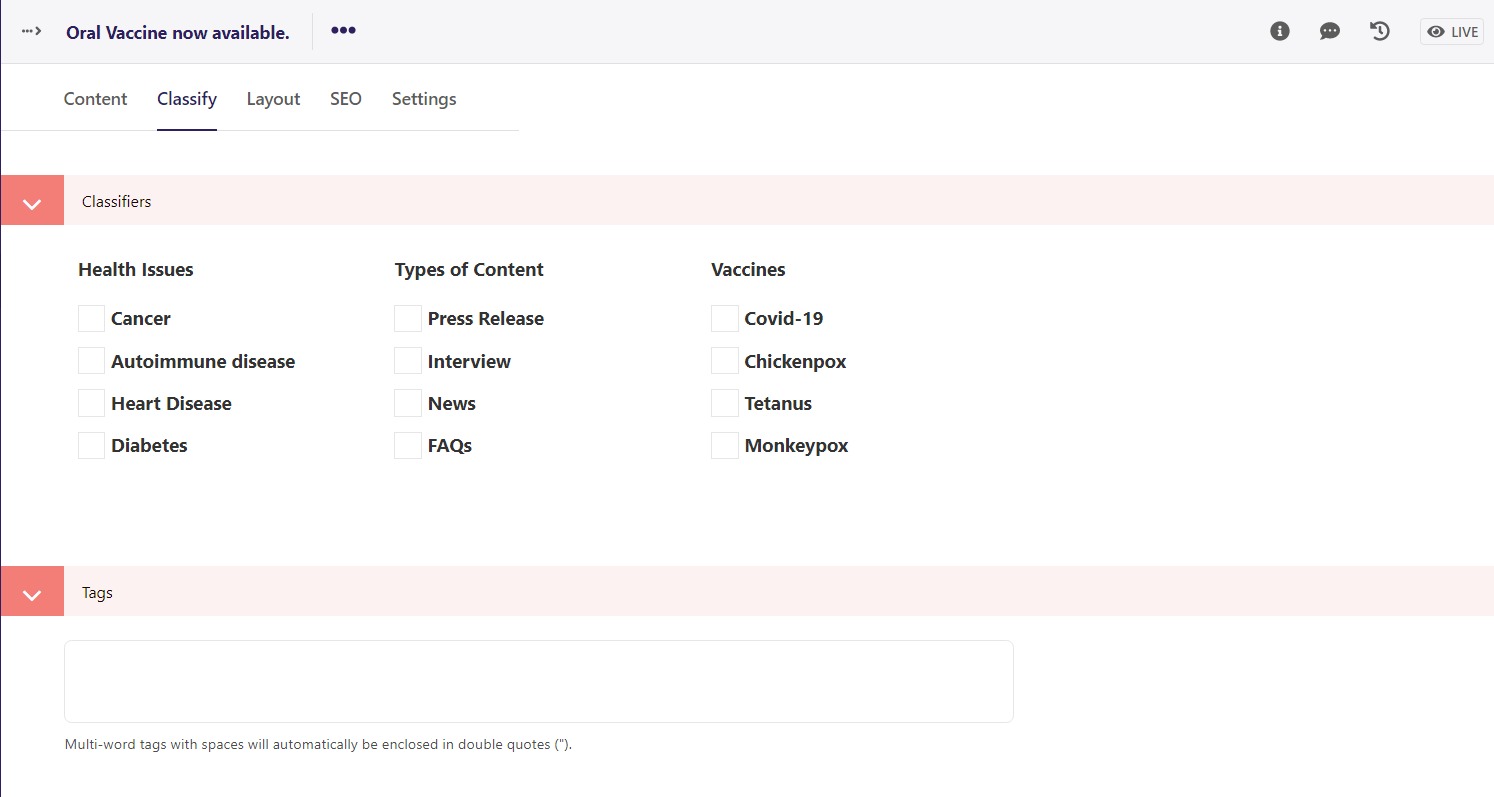
Okay, now we have some Classifiers to work with. Let’s head back to our blog posts and start categorizing them. In the admin screen Pages> Home > What’s New at CRX-Pharma > Any Article Page click the pencil to go editing screen. (alternatively, click the title and then edit). Next click the Classify tab and you’ll see the classifiers we setup.
The edit screen for the Classifiers that we can choose from in a blog post.
You can choose as many classifiers as you like. For our blog “Oral Vaccines now available”, we are going to choose classifiers Press Release, News, and Covid-19. For the “Cancer Drug Breakthrough” article, we classified it as Cancer, Press Release, and News. Additionally, we classified the “Now partnered with a great charity” with news and FAQs.
Using Classifiers across the site
One of the places where you might use the Classifiers is in a Latest Pages content block. For practice and to see this in action, let’s add a Latest Pages to our About Us page. Use the side menu in the admin screen to navigate to Pages > Home > About Us.
Choose Edit
Add a Responsive Grid Row
Choose Latest Pages
In the Parent Page Choose “What’s New at CRX-Pharma”
In Classified by choose “Types of Content > news”
Save draft and Preview
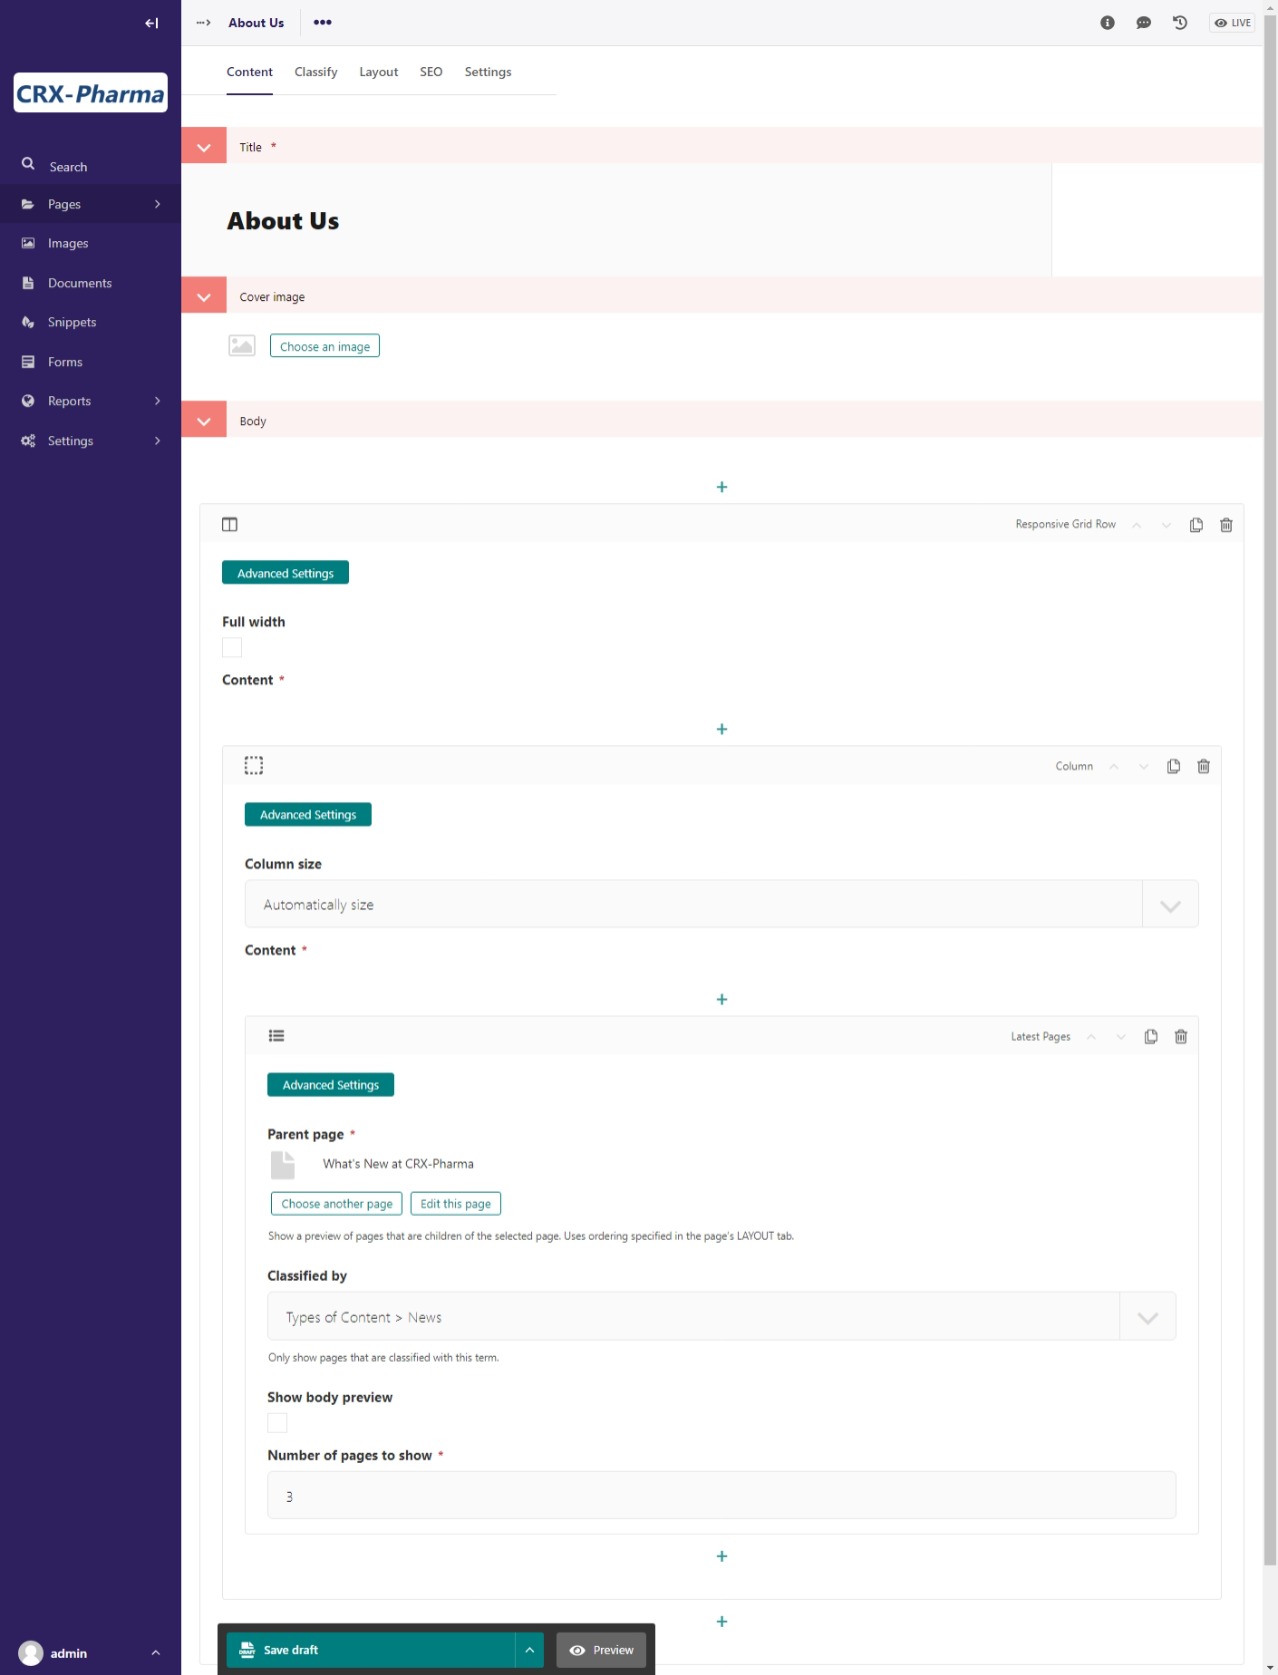
Editing the Latest Pages content block.
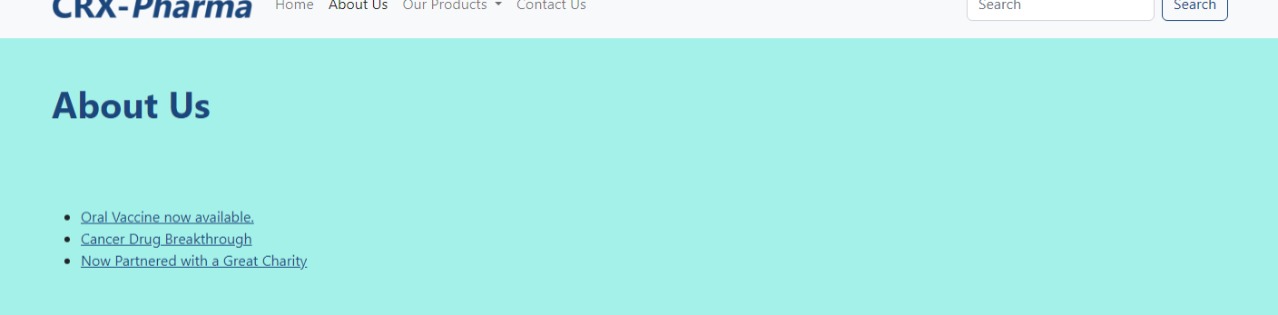
About us page with News Classifier selected in latest page block.
Let’s make a few changes to see the difference. In the editing screen,
Change classified by to “Health Issues > Cancer”
Select Show body preview
Save and Preview

About us page with cancer Classifier selected.
Notice that, only pages with the correct classifier show up. If you were to publish a new page with the selected classifier this page will automatically update with the new post. Take a look at the advanced settings for the latest pages block. There are different templates you can use for displaying article pages.
Using Classifiers on an Article Landing Page
You can also use Classifiers on an Article Landing Page. If we go to the “What’s New at CRX-Pharma” page and look at the Layout tab in editor mode, we can see our Classifiers in the Show Child Pages setting. If we only wanted to show press releases for that pages we can select that option. For now keep it as is.
Note
If you’re coming from WordPress, you can think of Classifiers as equivalent to WordPress Categories and Classifier Terms as equivalent to WordPress Taxonomies.
For more info on classifiers, see: Classifiers.
About Us Page Layout
For the rest of this section we can just take a few minutes and build out the “About Us” page. This gives us a chance to demonstrate how to add content blocks above blocks already on the page.
Find the Responsive Grid Row block in the editing screen.
Click on the “+” icon directly above it. Now we can add a block above the Latest Pages we just setup.
Choose Responsive Grid Row , then Column, then 1/2 Column for Column size
Choose Image link
Use Page link and select the “Our Facility” page
Make another 1/2 column
Choose Text
Make an h2 heading with “Founded in 2013” and some placeholder text underneath.
Click the “+” directly under the text editor
Choose “Quote”
Enter this Albert Einstein quote: “The true sign of intelligence is not knowledge but imagination.”
Directly above the Latest Pages block (in the same column) add a Text block
Enter “Current News:” as an H3
Save and Publish
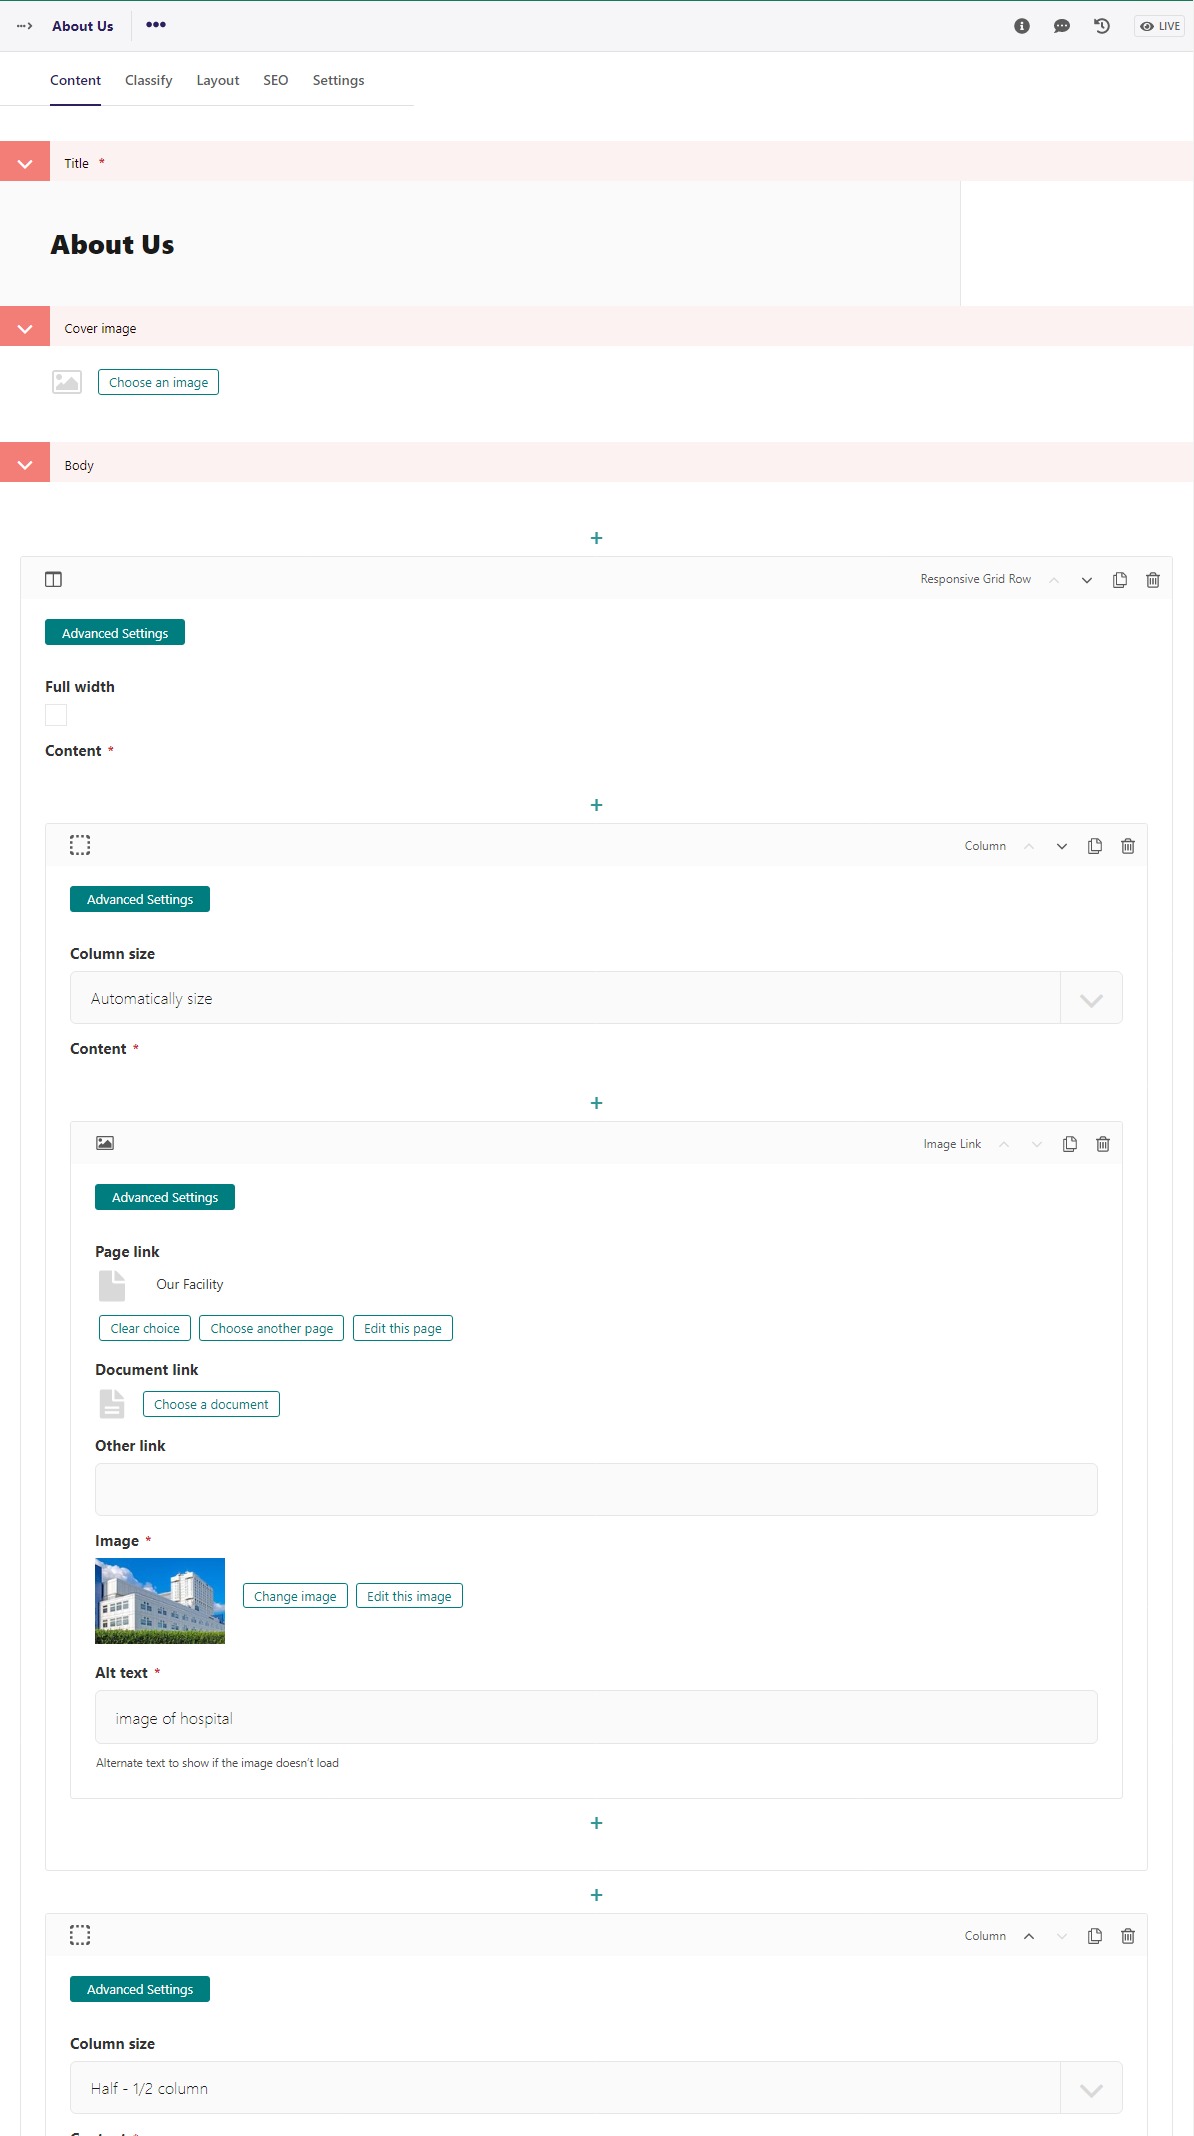
About Us Page edit screen 1 of 2
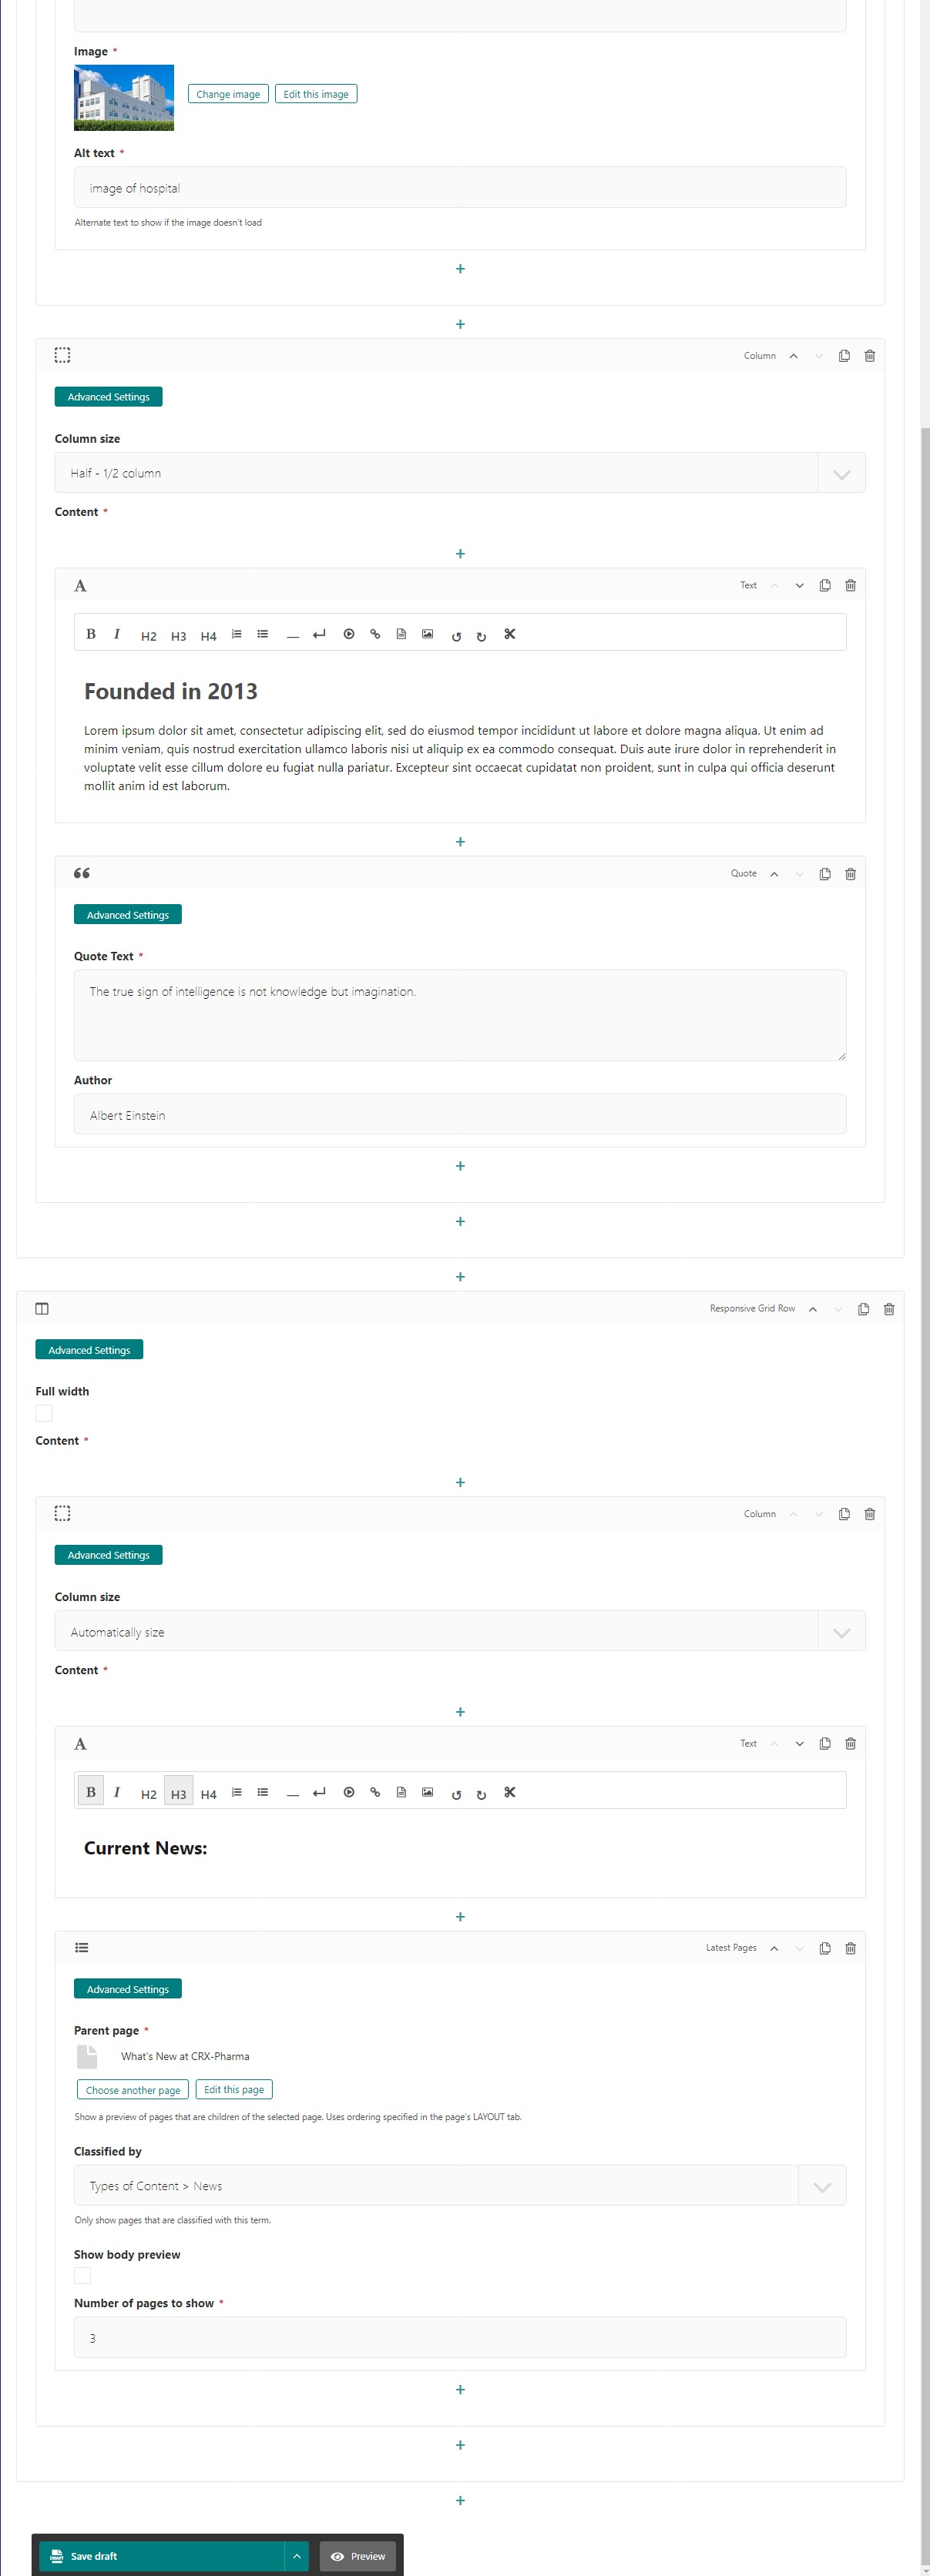
About Us Page edit screen 2 of 2
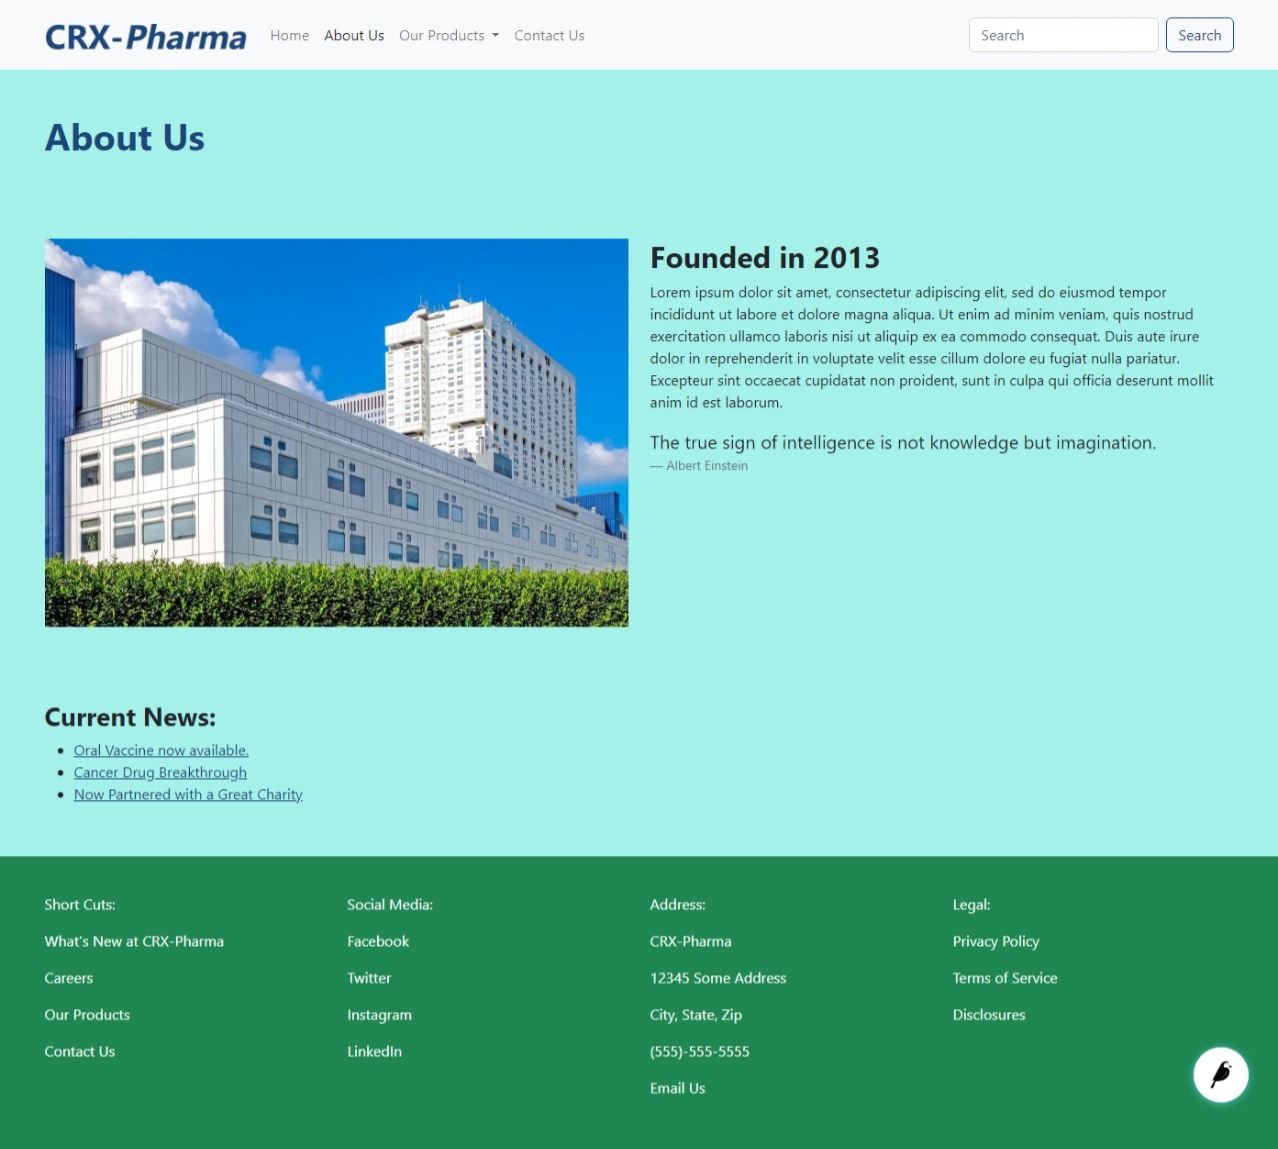
About Us Page after editing.
As you can see, you have tons of options when it comes to adding new content. Sometimes it takes a couple tries to get it right, however with a little practice it becomes second nature.